How to Make Photo Flash Gallery Tutorial
Photo Flash Gallery
Here's what you'll need:
- 1. Digital Photos for Flash Gallery (JPG/JPEG/GIF/BMP/TIF/DIB)
- 2. Songs as background music. (Optional)
- 3. Flash Slideshow Creator - Click to Download Free Trial
Step 1: Install Flash Slideshow Creator and Create a New Slideshow
Click here to download Flash Slideshow Creator and then install it.launch it and then click "New" button to start our slideshow. You can add,delete and rename folders and custom path to manage all your slideshows on this "MainMenu".
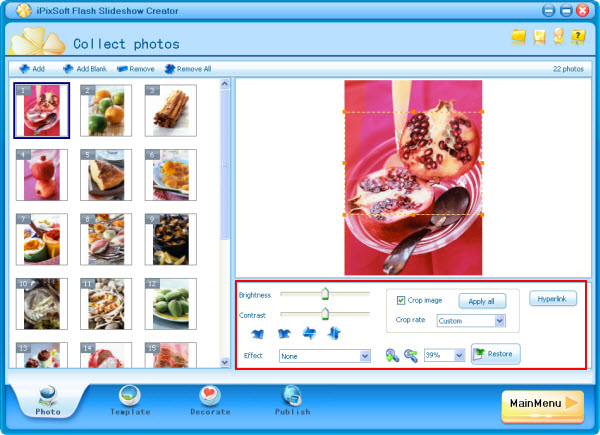
Step 2: Import and Process your Digital Photos
Add your digital photos and then process them with the built-in photo editing tool which includes some basic functions like Brightness, Contrast Crop, Rotate, Effect, etc. Click "Hyperlink" button to add hyperlink for each photo or all photos if you would like to.
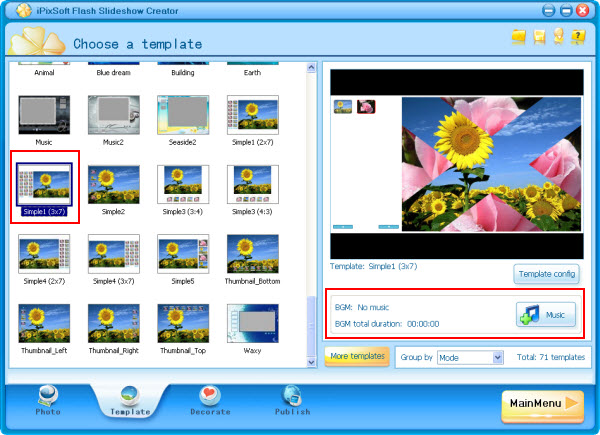
Step 3 : Select a suitable slideshow template and add background music
Click "Template" pannel, the slideshow creatore provides you lots of per-designed templates, select one you would like for your slideshow. If you would like to enable control buttons, simply click "Template config" button to change setting., After this, click the "Music" button to add a MP3/WMA/WAV audio file, it is optional. Here add no songs. Watch More Free Flash Slideshow Templates >>
Step 4 : Decorate with Cliparts,Transition Effects,Texts
The basic functions in “Decorate” panel includes Intro and End, Clipart, Add Text, Transition effects,photo frames, etc. You can use these functions to make your slideshow more vivid and attractive. Find them (the main functions) according to the image below. Here I disable Intro and End.
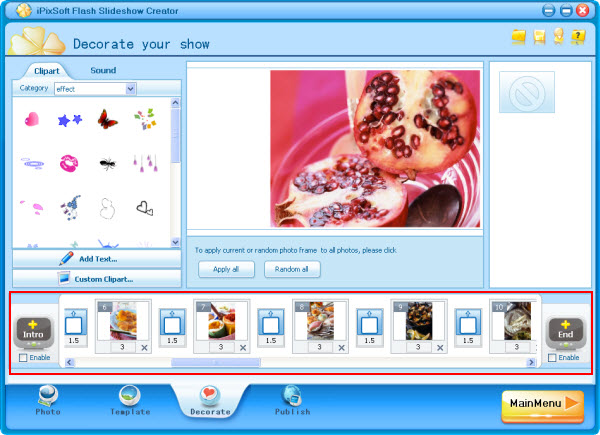
Select suitable transition effects for your photo gallery, the slideshow creator provides 70+ transitions including switch and push effects. You can choose each slide a effect or apply one to all slides. If you would like custom transition and photo duration, simply click them on the story board or via right click menu.

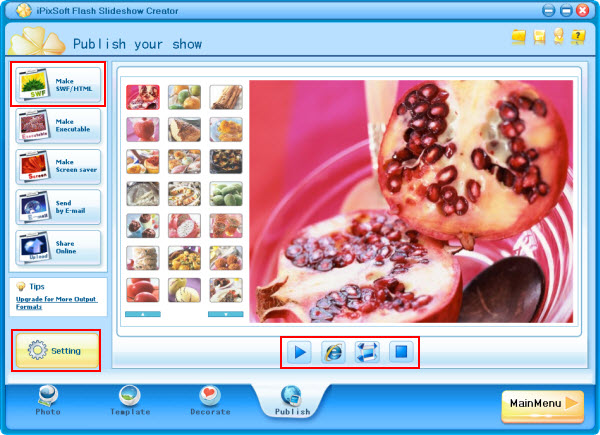
Step 5 : Publish and Embed Slideshow to Wordpress
Go to “Publish” panel, set output options such as Size, Flash option, quality, background color, start button, preloader and Loop Style and then preview your slideshow presentation. If you feel all things are satisfied, click "Make SWF/HTML“ to output your photo gallery as swf file format. If you would like to share online, you can click "Share Online " button to upload the slideshow to iPixsoft web server and get the html code, and then insert this HTML Code to your commercial website or blog.
After uploading the flash photo gallery to iPixsoft web server, you can get the html code. Simply embed this code to your Wordpress blog.
Web Hosting/Servers Recommend: myhosting.com
HTML Code(Just a sample):
codebase="https://download.macromedia.com/pub/shockwave/cabs/flash/swflash.cab#version=9.0.0.0"
id="Sample"
width="640"
height="480">
<param name="movie" value="https://www.shareonline.ipixsoft.com/full/98BAFBE0-67E2-44D5-9F5E-A642B24494EB.swf">
<param name="bgcolor" value="#FFFFFF">
<embed name="AM" src="https://www.shareonline.ipixsoft.com/full/98BAFBE0-67E2-44D5-9F5E-A642B24494EB.swf"
quality="high" bgcolor="#FFFFFF" swLiveConnect="true"
width="640"
height="480"
type="application/x-shockwave-flash"
pluginspage="https://www.macromedia.com/go/getflashplayer"></embed>
</object>
- Flash Slideshow Creator
- Download & Evaluate
- Purchase it NOW!
- Flash Slideshow Samples
- Flash Slideshow Templates
- Flash Slideshow Tutorials
- Key Features
- Support Center
- Flash Slideshow Samples
- Wedding Slideshow Samples
- Flash Photo Gallery Samples
- Flash Banner Sample
- Flash Animated Banner Samples
- Flash Photo Slideshow